 Want to start a blog but don’t know how? Do you want to learn how to start a blog for yourself in a matter of minutes? The total number of blogs in the USA alone is set to reach 31.7 million users in 2020, so it is no surprise that you are here to learn how to start a blog too and contribute to this content era. Whether it’s a personal or business blog, it is apparent that blogging has become a popular channel for content distribution to provide valuable information to your target audience.
Starting a blog may seem like a daunting task, especially if you feel like you don’t know where to start. You don’t need to spend a lot of money nor hire a professional to start. I feel its important that people learn how to start blogs and create content as it adds more value to the world. This value could be in the form of information, education or entertainment.
Perhaps you want to voice your opinion to the world; or you’ve been told that a blog is necessary to improve your website’s SEO; or maybe you feel a blog will help you connect and engage with your customers – whatever your reasons for starting a blog, the following step-by-step tutorial will guide you through everything. At the end, you will be able to start a blog in just a few minutes without spending a lot of money and you’ll begin your blogging journey.
WHAT’S NEEDED
Before we get down and dirty into the details, here is a summary of what you need to start a blog:
A blog concept
Domain name
Blogging software
Blog design
Hosting
Content
What’s in this guide:
What's In The Guide?
CREATING A CONCEPT
The first step to creating your first blog is to decide on what to blog about. Whatever your reason behind starting a blog, I’m sure you want to build an audience of readers. It would be quite pointless to create a blog that gets not a single reader unless you’re doing it purely for the fun of it and don’t mind the idea of blogging for no one but yourself.
So how exactly do you come up with a blog concept?
To help you out, ask yourself the following questions:
What topics are you knowledgeable about?
Here, list all the topics that you have expert knowledge in. Also, consider the knowledge based on your experiences. People always connect to practical content that is relate-able.
Of those topics, what is the audience content need?
If you have expert knowledge on “how to fix a broken toothbrush with your neighbor’s screwdriver” and not a single person on the planet has a need for that information, then it would be pointless to dedicate a life-long blog to that topic.
How to Check a Topic Demand
You can easily research the demand of your topic by using the Google Keyword Planner. The google keyword planner is a useful tool to check online searches made on google which is a reflection of topic interests too.

Type in an example of a blog topic you would write about.

Set the location of your target audience, or leave it if you wish to check worldwide stats and search.
Review the search results under the keyword ideas tab. The number in “average monthly searches” column will give you an idea of the content need for that topic. If there is nothing showing, it means no one is searching for that content. It is not critical to write on a topic that is searched for in high volumes – it’s just good to know that there is some sort of need for the content that you plant to write about.

Who is your target readership audience?
Are you targeting moms, young adults, students, women, men, businesses? Where is your audience? Are they local or are you targeting a global audience? Understanding your target audience will help you mold the right content that will be interesting and valuable to them.
What is the objective of your blog?
What are you trying to achieve? Do you want to engage with people? Do you ultimately want to sell a product or service? Do you want people to subscribe?
A great blog concept is one that is based on a topic that you are knowledgeable about that is in demand by a specific target audience that will get you to meet your objective.
NAMING YOUR BLOG
Once you have your blog concept clear, you can name your blog.
- List words that are relevant to your blog topics to help you come up with a name. Your blog name should suggest what content topics readers can expect.
- Consider naming your blog after yourself.
- Your blog name should be simple, unique and memorable. Avoid using complicated words that people don’t understand or words that are difficult to spell or remember.
- Research your blog name to check if it already exists. Readers should not confuse your blog with others. You can Check domain name availability with a whois lookup tool such as this. If your blog name is “Lunch by Lisa” but the domain name lunchbylisa.com is not available, you should avoid having a different domain name e.g lunchwithlisa.com – this will only confuse your audience.
REGISTER YOUR DOMAIN
Once you have named your blog, you can proceed to register your domain. This can be done online through any one of the many domain registrars.
Here is a list of some domain registrars:
- namecheap.com
- godaddy.com
- register.com
First, check and confirm availability of your domain name. You can choose among a variety of domain extensions besides the traditional .com such as .org .net .info – just to name a few.
Proceed to checkout and purchase your domain.
CHOOSING THE RIGHT BLOGGING SOFTWARE
Thankfully you don’t need to build a blogging platform yourself, as there are a number of useful ready-to-use blogging systems.
Here are some of the popular blogging systems:
WordPress

WordPress is the most used blogging platform in the world. WordPress has two blogging platform options:
WordPress.com
This is the free version hosted on the WordPress servers. Although it has limited features, you can signup and start blogging immediately with the free version. Your blog will not be customized to your own domain, although at a subscription fee you can link your domain.
WordPress.org
This is the self-hosted software version of WordPress that allows you to install it on your own server. You have unlimited flexibility as far as add-ons and customization are concerned. As it is hosted on your server, you can link it to your domain name of choice.
Pros: WordPress has an extensive range of themes and plugins.
Cons: Because WordPress is highly used, it is more susceptible to security attacks.
Blogger

Created by Google, Blogger is a free hosted blogging platform. Adsense can easily be added on to your Blogger blog. Blogger is a simplistic platform with just a few themes and limited customisation. Your blog will be a subdomain of .blogspot.com
Pros: Adsense can easily be placed.
Cons: Limited themes
Tumblr

Tumblr is a free hosting microblogging social platform that allows people to share short blog posts in various content versions. It is not suitable if you wish to share traditionally long blog content. Tumblr can be customised and there is a library of themes to choose from.
Pros: Large theme library
Cons: Limited plugins
Because WordPress is widely used and highly customisable, we will be using this blogging software for the rest of this tutorial.
HOSTING YOUR BLOG
If you are using WordPress.com (hosted version) skip this and continue to Step 8. If you are using WordPress.org (self-hosted version) then you will need to find hosting for your blog.
These days, many popular web hosts offer quick install options for software like WordPress. This means that installing WordPress to your hosting space is as simple as clicking a button. It would be beneficial to choose a web host that offers Cpanel and has the WordPress software pre-installed as this will save you the hassle of getting technical and moving files and databases.
INSTALLING YOUR BLOG
Once you have purchased your hosting space and received your Cpanel credentials, login and follow the steps below to install WordPress.
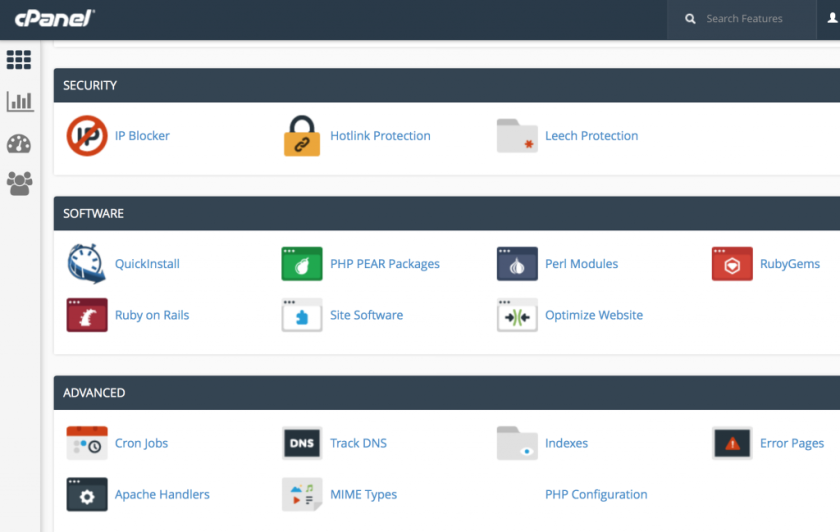
In your Cpanel dashboard, in the software section click on QuickInstall to take you to a library or pre-installed software that are available for you to install at a click.
Once the QuickInstall window has opened, under the blog category click on WordPress.
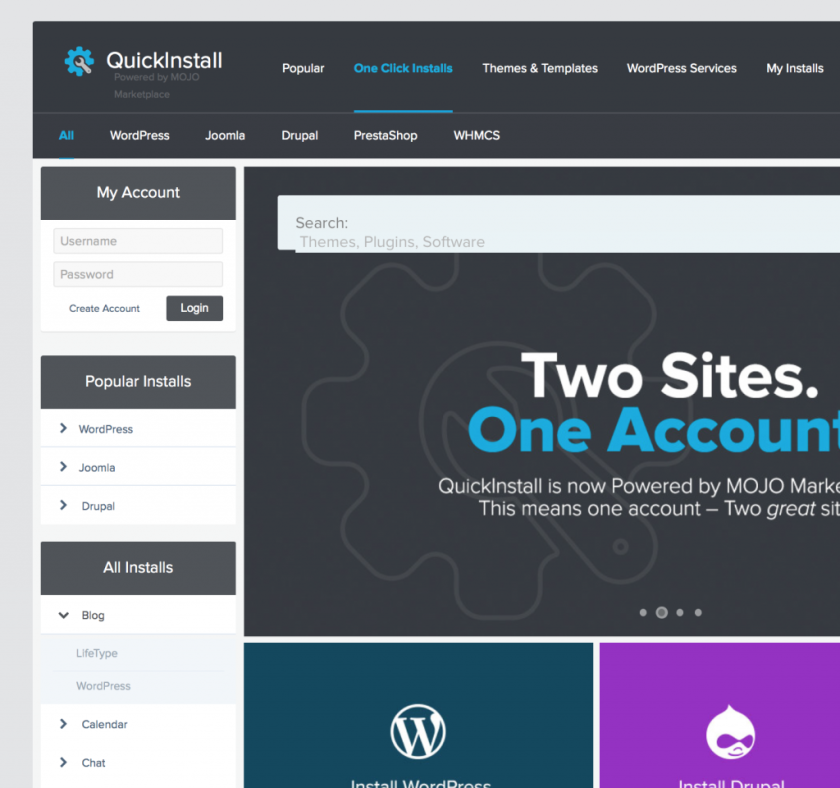
In the “Install WordPress for Free” option, click on install WordPress.

Complete the setup form by selecting your domain name (which should be already linked to your hosting account as part of your hosting setup). Enter in your blog title, email as well as first and last name details.

Once you click on “Install WordPress” you will receive an email with your WordPress login information.
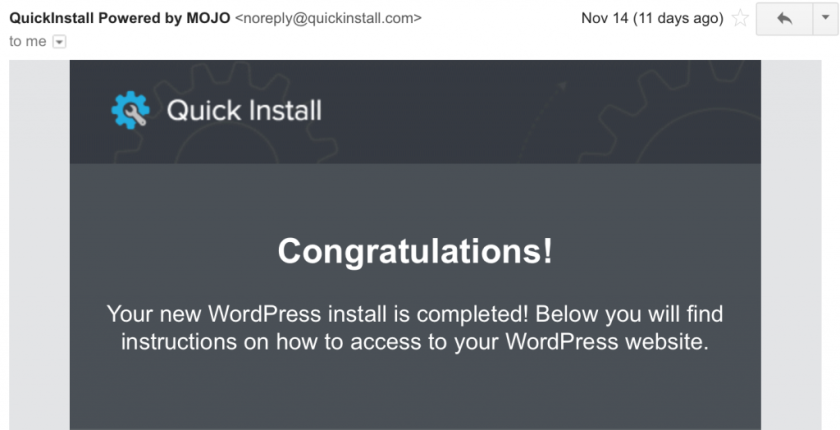
HI-FIVE! You have successfully installed your WordPress blog.
Designing the Perfect Blog
WordPress comes with default themes that you could simply customise with your logo and colours should you wish to. These themes are very basic and are acceptable if you are just starting out, however, if you want your blog to look attractive it is worth investing in a premium theme. You can purchase a premium theme from WordPress theme marketplace such as Themeforest which is the largest in the world.
Choosing the Right Theme for You
Wherever you decide to purchase your premium theme, it is important that you find the best theme for your blog needs. In order to know what is best, you need to know what features are required on your blog. Do you need gallery features because you intend to share a lot of image content? Are you starting a food blog and need your content displayed in recipe style? Do you need destination features because you’re starting a travel blog?
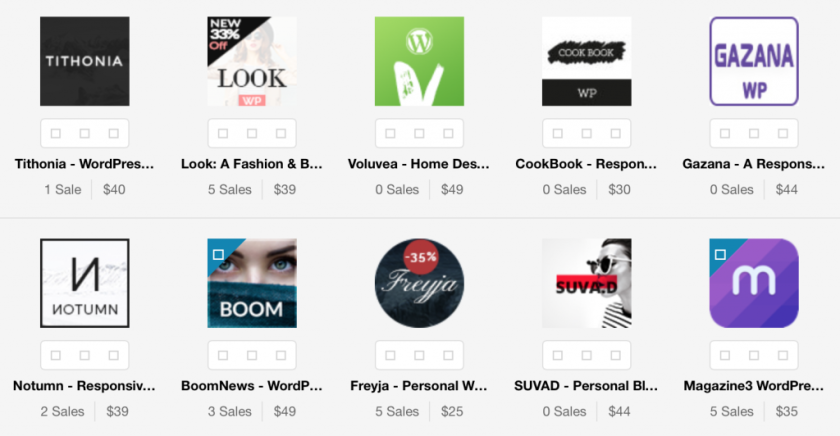
PRO TIP: Choose a theme that is responsive so your website will adjust to any screen size without being distorted. Over 50% of web users are mobile so it is necessary to ensure your website is attractively displayed on any device.
Installing Your Theme
Once you have found the right theme and downloaded the theme files, you can install it.
Here is a guide to help you install your theme:
In your WordPress dashboard, under the Appearance menu select Themes.
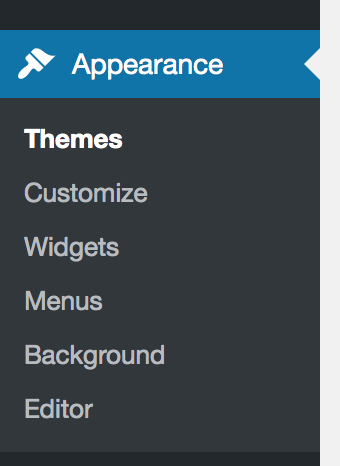
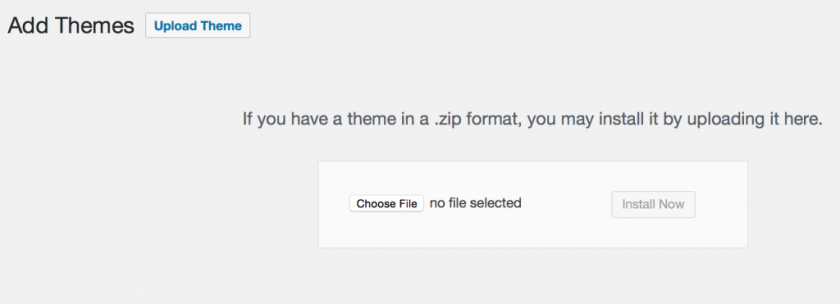
On the Themes pages, select Add New and then Upload Theme.

Upload your theme .zip file, and Install Now and Activate.
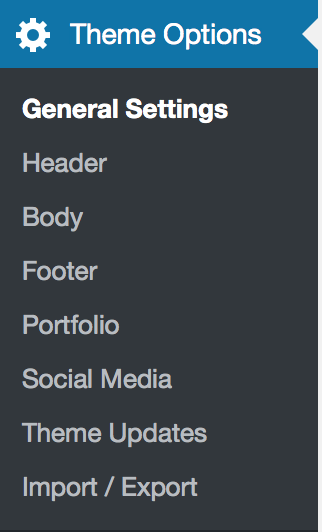
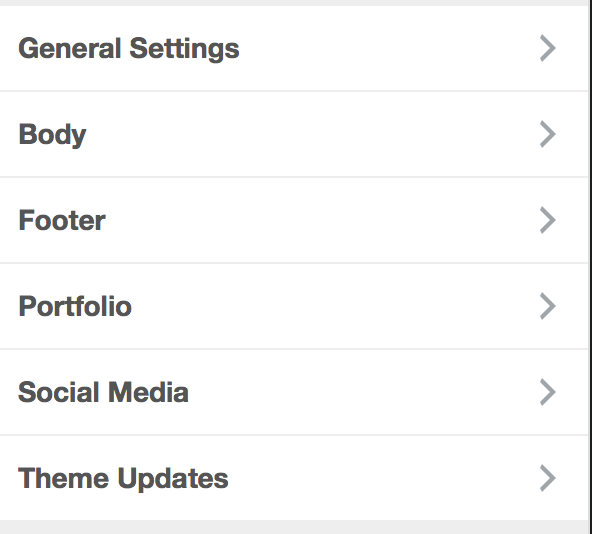
Once your theme has been successfully installed, you will most likely have updated options in your WordPress menu such as Theme Options where you can customise various features and settings of your website.
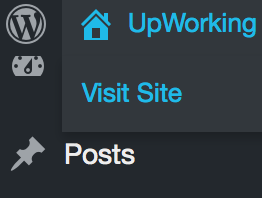
To see what your website looks like in the new theme, go to your domain. Alternatively, click on your blog name at the top left-hand side of your WordPress dashboard and click on Visit Site.
CORE BLOG SETUP
As you can tell, your blog is looking very bare at the moment. There are a few things that you will need to adjust and update before you can begin blogging.
Upload your blog logo and update your website colors. This can be done by going to Themes, on your activated theme, click customize.

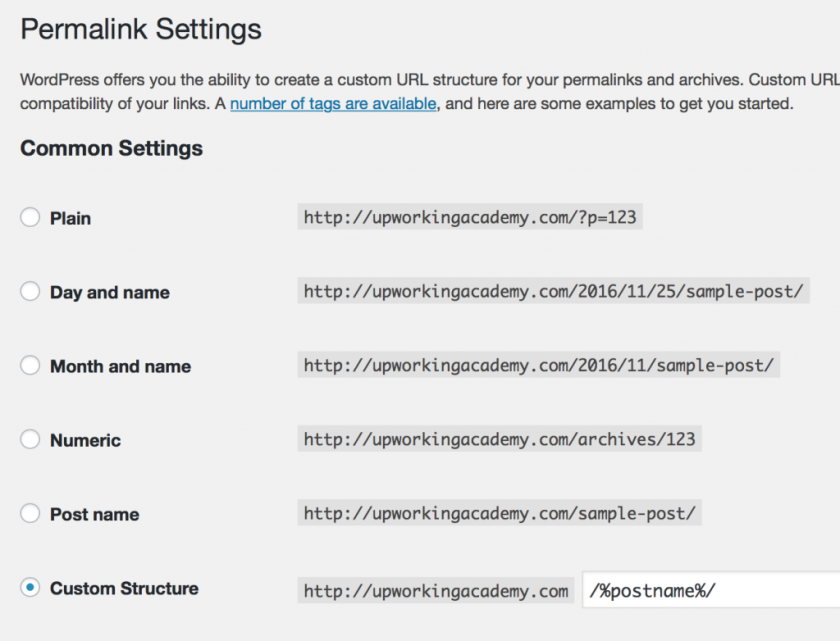
The next important and critical step is to update your blog permalinks. Permalinks represent the URL structure of your blog links to various content pages. By all means, avoid having a plain permalink structure with page IDs. This is bad practice for Search Engine Optimisation (SEO). Instead, consider a more descriptive URL structure such as the post name.
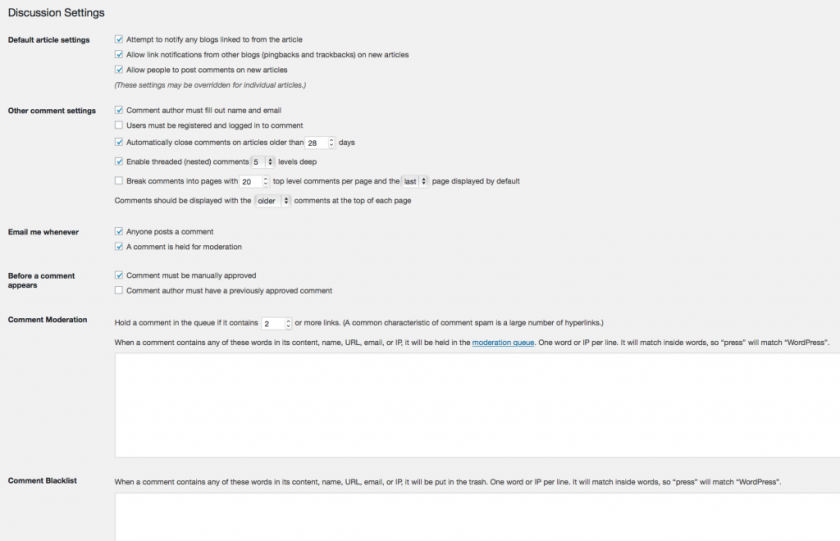
A cool feature on WordPress is user commenting. Manage comment moderation and notification settings under Settings and click on Discussion.
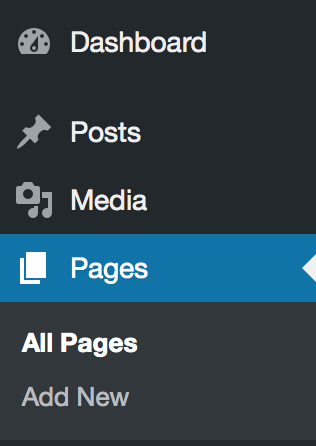
Core pages. Every blog should have core pages set up such as About, Contact and maybe even a custom Home page if your blog is not on the home page. To set up these core static pages, go to Pages in your WordPress menu and select Add New. A page editor will open up where you can enter the page name, page content then you can publish your page when you’re complete.
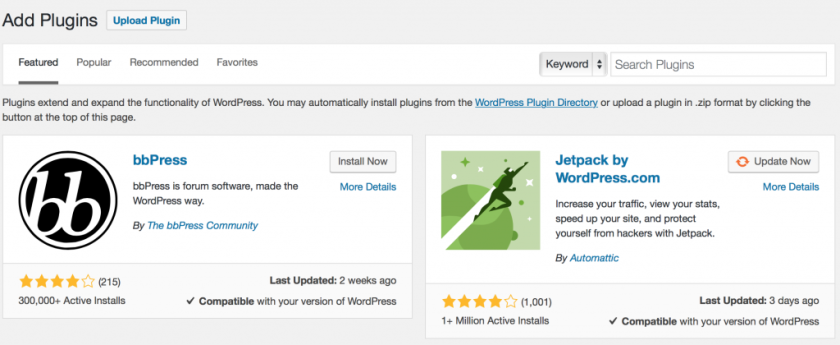
Plugins are extensions of WordPress that enable specific features and functions. You can add a plugin by clicking Add New under the Plugins menu item. If you have purchased a premium plugin, you can upload it and activate it. Alternatively, you can browse through the plugin library to select and activate a plugin.
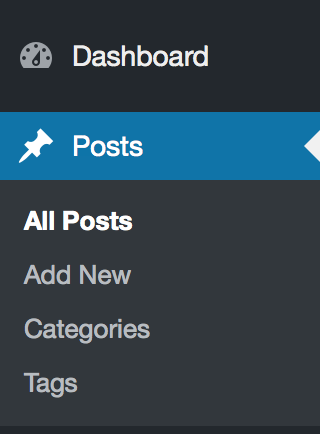
PRO TIP: WordPress is make up of two main content structures, pages and posts. Pages are static content on your website such as about and contact pages. Whereas posts, refer to your actual blog posts. Posts have certain features on their display on your blog website. All your posts are displayed in order, one after the other on the blog page and can be categorized for easy content sorting.
PRO TIP: Before installing and activating any plugin or theme, always insure that they are compatible with your current version of WordPress to avoid your website from breaking.
CREATING YOUR FIRST BLOG POST
Here’s where the exciting stuff begins – you can start creating your blog content.
Create your first blog post by clicking on Add New under Posts in your WordPress menu.
A post editor will open where you can input your post title and content.
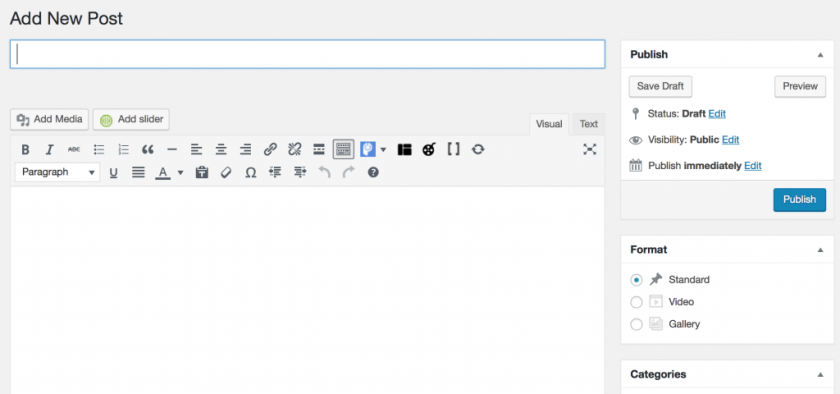
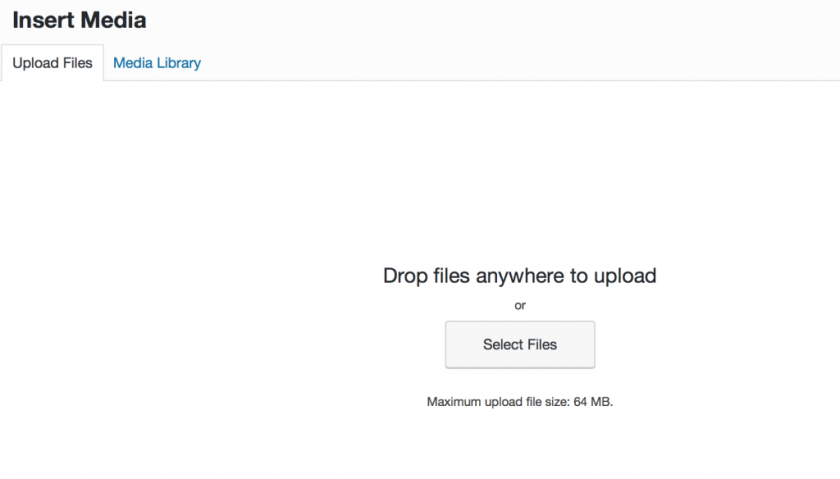
While you are writing your blog post, you may want to insert an image or media file. You can do so by placing the curser where you wish the file to go and click on Add Media. A popup will appear and you can upload your file and insert it into your post.

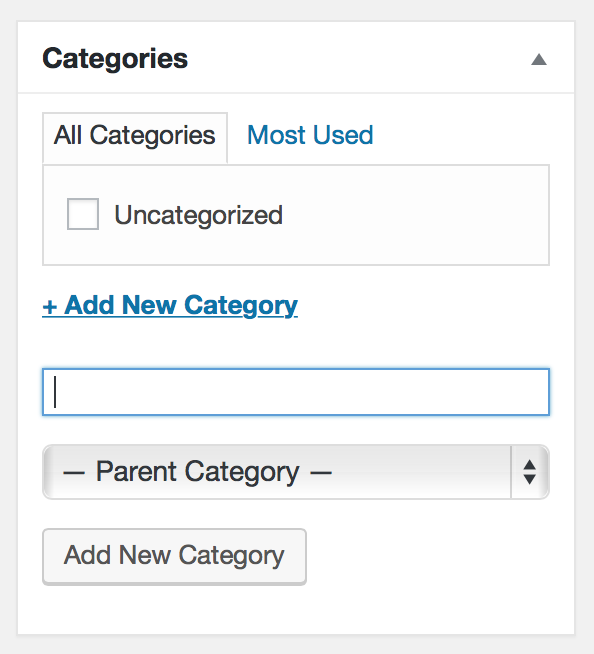
It is best practice to categorize your blog content. It makes it easy to group certain content topics and helps your audience find topics that they are interested in.
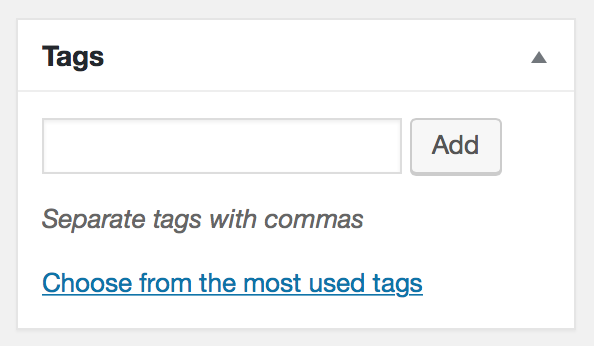
Add tags to your blog post. Tags are short keywords that describe the details of your post.
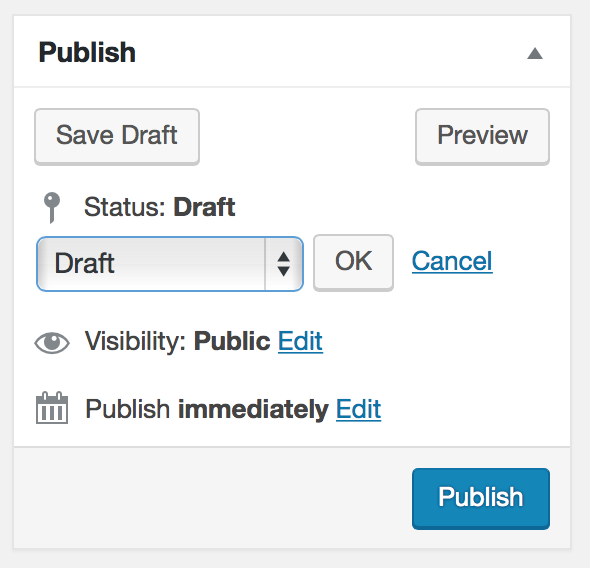
When you have completed your post, you can publish it. Alternatively, you can save it as a draft to edit and publish at a later date.
BLOGGING BEST PRACTICES
To help you build and maintain a successful blog, here are some best practices to help you.
Content is king.
The most important part of blogging is creating quality content. As long as you create high-quality content, your audience will value your blog. So will Google.
Use keywords.
When you create a blog post, decide what keywords you would like to target for that post. That is, what keywords would people search on search engines to get to your blog post? When you know what keywords you are targeting, be sure to place those keywords in the title of your post as well as several times in the content of your blog post. Keep it as natural as possible. The purpose of this is to improve your SEO ranking for those keywords. If done correctly, your blog will receive a lot of organic search engine traffic that will gradually build your readership.
Use analytics.
Install Google Analytics to monitor the visitor activity on your blog. This will show you where readers are clicking and how long they are spending on each page that they visit. You will be able to see which blog posts has a lot of page visits and which ones done. This will help you to expand on high performing topics while revise low performing ones.
Be consistent.
Create a content schedule that you can follow to consistently publish content. Readers and search engines love fresh content.
Clear content.
Avoid creating large book-long paragraphs of text. This is unattractive to the eye and difficult to follow. Use images, headings and bullet points to organize content clearly for your readers.
To build your readership, consider sharing your blog posts on your social media profiles. People within your circle are likely your first readers, and if your content is great then there will share it within their circle and so on.
Engage with your readers.
If your readers leave comments about their views on your blog post, acknowledge them and consider their feedback.
Keep WordPress up-to-date.
For best security, ensure your WordPress version together with your themes and plugins used on your blog are kept up-to-date.
Backup your blog.
Its is best practice to make regular backups of your website especially before you are about to update your WordPress version or your themes and plugins. Sometimes, updates to your blog may cause it to break and you could risk losing all the valuable content that you’ve spent time building. To eliminate such risks, be safe and backup.
Congratulations. You have now learned how to start a blog. You have saved yourself thousands of dollars on hiring someone to do this for you as you are now equipped to do it all yourself. This was an important lesson because you will now be able to start publishing your content and share it with the world. Remember that you will now be able to offer value to your readers.
That concludes this guide on how to start a blog. Did you find this tutorial useful? Was it easy to understand? Let us know by posting a comment below. If this tutorial was helpful to you and would like others to learn how to start a blog, share it with them.
Happy blogging!